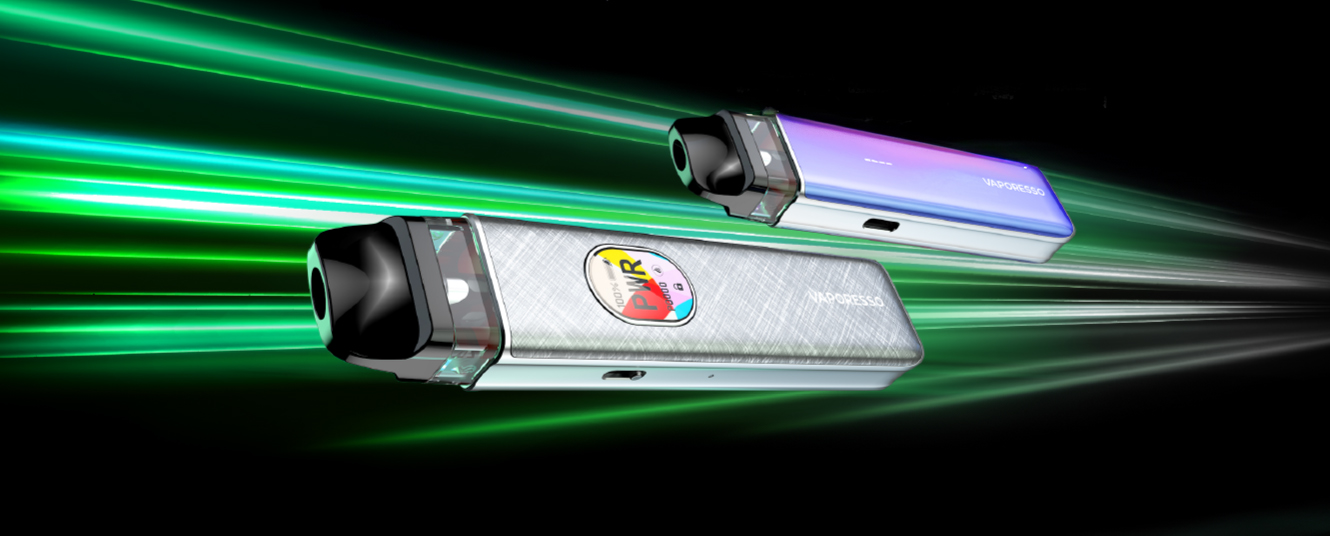
- How to use the Vaporesso XROS 5 and XROS 5 Mini pod vape kits
- How to charge the Vaporesso XROS 5 and 5 Mini
- How to fill the Vaporesso XROS 5 and 5 Mini
- How to change Vaporesso XROS 5 pods
- How to adjust the Vaporesso XROS 5 airflow settings
- How to fix a Vaporesso XROS 5 which is not working
- The best vape juice for the Vaporesso XROS 5
- XROS 5 vs XROS 4: how do they compare?
- Final thoughts
Vaporesso have just launched the newest pod kits in their XROS range, the XROS 5 and XROS 5 Mini. Vaporesso are one of the most popular brands out there right now and the XROS vape kits have long been one of their top lines.
The new version brings an even more improved design with longer battery life, making the XROS 5 and XROS 5 Mini a top choice pod kit. Whether you’re already a Vaporesso fan or you’re new to the brand, we’ve gathered lots of essential information about the XROS 5 and XROS 5 Mini to help you make the most of your vape.
While you should always read the user manual that come with any vaping products, this guide will help you discover how to use the kits and what to expect.
How to use the Vaporesso XROS 5 and XROS 5 Mini pod vape kits
The XROS 5 and XROS 5 Mini have been designed to be simple to use and approachable, with an intuitive user interface. To get started with your new device make sure the battery is fully charged, then fill up the pod with your preferred compatible e-liquid. Allow the coil to prime, as outlined below, and then you are ready to start vaping.
How to prime your coil
Priming your coil is a simple but very important step whenever you are inserting a new pod. It not only makes sure that the pod is ready to use, but also helps improve the longevity of the pod, letting it last longer before needing to be replaced.
Simply fill the pod with your chosen e-liquid and leave it for 5-10 minutes. This allows the cotton inside the coil to fully absorb the e-liquid, ensuring it is well saturated and will not burn straight away. You can find more handy tips on prolonging the life of your coil in our coil lifespan guide.
How to turn your Vaporesso XROS 5 on
Turning your Vaporesso XROS 5 on and off is easy. Simply click the button on the side of the kit five times in quick succession.
You can also use the button to change the power output by clicking it three times. There are three settings, eco, normal and power which will be indicated on the screen. If you use the 0.4 ohm pods, you can adjust the power precisely with a 30W max power output.
Another handy feature of the XROS 5 is that you can lock the device when not in use by clicking the button four times. Navigate to ‘button on’ or ‘button off’ to lock and unlock the fire button. When locked, the button cannot be accidentally pressed while in your pocket or bag, but you can still use the device through draw activation.
How to turn your Vaporesso XROS 5 Mini on
In order to offer a user-friendly design, the XROS 5 Mini does not have any buttons, so you don't actually need to turn it on at all. Instead, it utilises inhale activation, so you just need to inhale through the mouthpiece to start vaping.
Check out the video below for a visual guide to setting up your new Vaporesso XROS 5 Mini pod kit:
How to start vaping with the Vaporesso XROS 5
The XROS 5 offers two different ways to vape, so you can choose the option that feels most comfortable to you. You can choose between button activation, where you hold down the fire button to vape, or draw activation where you simply need to inhale through the mouthpiece.
The XROS 5 Mini on the other hand offers only inhale activation, so there is no need for buttons at all.
How to use the power settings on the Vaporesso XROS 5
The Vaporesso XROS 5 offers three pre-set power settings; eco, normal, and power. The power mode is indicated on the screen and is easy to switch between.
Pressing the power button three times in quick succession will open the settings interface on the display screen. You can then use the power button to cycle through the three power settings to select the one you would prefer. To make your selection simply settle on your chosen power output and do not press the button again and after a couple of seconds the selection will be made. The power setting is displayed on the power screen so it is easy to check which one you have selected.
In addition, the XROS 5 offers themes for the LED display. If you press the button on the side twice, you can cycle through the themes to personalise your display.
Take a look at the video below for an extended visual guide on setting up your new Vaporesso XROS 5 pod kit:
How to charge the Vaporesso XROS 5 and 5 Mini
The XROS 5 series features a 1500mAh internal capacity battery. The XROS 5 has a precise battery indicator on the display screen, whereas the Mini has an LED light that indicates battery levels.
Both the XROS 5 and the Mini are charged through USB – C. To charge, you simply need to connect the charging cable to an appropriate power source and insert into the port on the side of the device. Charging takes around 30 minutes, so you’ll never have long to wait.
How long will the battery last?
Unfortunately there is no simple answer to this question, as how long the battery will last for you depends on a number of different factors. For example, how frequently you vape, the length or your inhale, and which power setting (XROS 5 only) you use will all affect the battery life. The battery power indicator helps you keep track of your remaining battery, but if you want to ensure your battery is lasting as long as possible we recommend always making sure the device is able to reach a full charge, and not letting the battery run out completely before recharging.
How to fill the Vaporesso XROS 5 and 5 Mini
The entire XROS range are all compatible with the Vaporesso XROS COREX pods, which is ideal if you are upgrading from one the previous generations of XROS and still have pods remaining. To fill your pod you will first need to remove the mouthpiece, which can be done by gently snapping it off to one side, it may be a little stiff at first but will loosen up with use.
Once the mouthpiece is removed it will reveal three holes in the top of the pod, it is important to ensure you are inserting the e-liquid only into the red hole. The red hole has a 'membrane' to prevent leaking, so you need to push the nozzle of your e-liquid bottle past the membrane and squeeze to release the e-liquid into the pod. There is a small hole on the opposite side which will release air as the pod fills, to make sure the e-liquid is evenly distributed, but you may need to tilt the pod slightly if one side fills up faster than the other.
The centre hole, which has a silver metal outline, goes directly to the coil, so make sure you are never inserting e-liquid here, as it will likely just come straight up into your mouth when you next inhale. When the pod is filled just pop the mouthpiece back in place. If it is your first time using this pod let the e-liquid sit for 5 - 10 minutes before using so the coil can prime, but if you are just refilling the pod it can be used straight away. The clear plastic of the pod means you can easily see when the pod is full and keep an eye on how much e-liquid you have remaining.
How to change Vaporesso XROS 5 pods
When it comes to replacing your XROS 5 and XROS 5 Mini pods it really couldn't be easier! Just pull the used pod out of the device and dispose of it appropriately, and insert your new pod. The pods are held in place by magnets so as you insert it you will feel the pod being pulled into place. Remember to let the new pod prime before you use it to avoid it burning out prematurely.
XROS pods have a SSS anti-leaking design to prevent the vape juice leaking out when the device is not in use or is being stored. The pods are magnetic, which helps keep them in place, and all XROS pods are cross compatible, so you can continue to use any pods you have from a previous XROS device.
How to know when it is time to change a pod
There are a few different things you may experience that are all indicators that you need to replace your pod. A change in the flavour is the most common indicator, with the flavour either becoming burnt, bitter, or muted. It is best to change your pod as soon as possible when you start to experience a change in flavour, as this means the cotton is starting to burn and the flavour will only continue to deteriorate until the pod is changed.
Another common indicator is your e-liquid quickly becoming quite dark in colour within the pod. This is obviously more easy to spot in clear e-liquids, but if you notice that your e-liquid is getting darker in colour not long after it has been filled, this usually means it is taking on the colour from the burnt cotton in the coil.
Sometimes, bubbling, spitting or leaking can indicate that it is time to change your pod, but this can also be caused by a build-up of excess e-liquid. If you are experiencing this the best thing to do is first clear the excess e-liquid to see if this resolves the issue. Hold a tissue or dry cloth by the airflow holes and blow through the mouthpiece of your device, this will expel any e-liquid that has built up in the coil or airflow and allow you to wipe it away easily. If the problem persists, especially if you have been using the same pod for a while, it likely means that is it time to replace the pod.
How to adjust the Vaporesso XROS 5 airflow settings
Both the XROS 5 and XROS 5 Mini offer adjustable airflow, which can be easily controlled via a switch on the back of the device. This gives you precise control over the airflow design, so you can experiment with different settings and find what works best for you.
Moving the switch fully to the left will completely open the airflow for a loose and airy draw, you can then move the move the switch incrementally to the right to close the airflow more and find your preferred setting. Restricting the airflow will offer a tighter feeling draw, although we do not recommend completely closing the airflow as this can make it difficult to vape.
How to fix a Vaporesso XROS 5 which is not working
The first port of call if your Vaporesso XROS 5 or 5 Mini is not working is to ensure that it is sufficiently charged. If the battery has run too low the device will stop working and will show a low battery indication.
However, if the battery on the device is sufficiently charged but the device has encountered an issue which prevents it from working as expected, this can sometimes be indicated via the LED light. If the light is blinking red this indicates an issue. On the XROS 5 (with the LED display) it may be that the screen flashes, or the pod isn’t drawing properly.
How to fix a Vaporesso XROS 5
If you notice that your Vaporesso XROS 5 is displaying a blinking red light and not producing any vapour, this indicates that one of the safety features built into the device has been activated. The first port of call in this instance is to consult the user manual that came with the device, as this light could be indicating high temperature, low resistance, a short circuit, or that the device cannot detect a pod.
We recommend removing the pod and checking the connection to make sure there is no lint or e-liquid that could be preventing the pod from making a connection. If you have removed any debris and the problem persists this could indicate that the problem lays with the pod, in which case we recommend replacing the pod with a new one.
If you have tried both of these options and the indicator light continues to flash, or the device is still not producing any vapour, it could mean that there is an issue with the device and you need to contact the seller.
The best vape juice for the Vaporesso XROS 5
The pods used with the XROS 5 and XROS 5 Mini contain a relatively small coil, which will need to be paired with a 50/50 or high PG vape juice, as these ratios have a thin consistency which is easy for the coil to absorb and remain saturated.
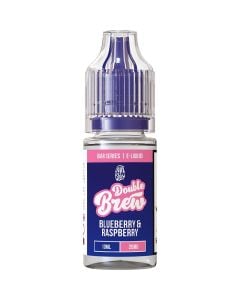
From there, the flavour, nicotine strength, and brand of e-liquid is entirely up to you and your preferences. If you are looking for a new e-liquid that will work well with these devices, we recommend Ohm Brew, Double Brew, and ELFLIQ as a great place to get started, as they all have a very wide range of flavours and nicotine strengths which cater to all different preferences.
If you are particularly interested in a strong flavour payoff, you may also want to consider bar salts. These e-liquids commonly have a higher percentage of flavour concentrate than standard e-liquids, offering a much more powerful flavour experience. You can also check out our guide to e-liquids for more information and recommendations.
XROS 5 vs XROS 4: how do they compare?
If you’re wondering what makes the XROS 5 series different to its predecessor, the XROS 4, the answer is it’s bigger battery in both the XROS 5 + Mini and, for the XROS 5, the LED display screen. The screen on the XROS 5 allows you to see remaining battery life, display themes, and power modes, as opposed to the simplified system used on the XROS 4. When it comes to the XROS 5 Mini, the LED indicator has changed to have a more precise indication of battery levels.
Final thoughts
The Vaporesso XROS range are known for offering a reliable and enjoyable vaping experience, and the XROS 5 and 5 Mini have certainly elevated that experience.
The XROS 5 is benefits from more in-depth display screen, with precise battery levels, power modes, and more. It still features that familiar sleek design to remain comfortable and discreet.
The XROS 5 Mini is a fantastic option for new vapers, offering simplicity with a robust and reliable design with an improved battery indicator. By combining draw-activation with adjustable airflow, this handy little vape kit perfectly pairs ease of use with the ability to personalise your vaping experience.