- How to set up your Vaporesso XROS 6 and XROS 6 Mini pod vape kit
- Vaporesso XROS 6: How to change the wattage
- How to charge the Vaporesso XROS 6 & XROS 6 Mini
- How to fill the Vaporesso XROS 6 & XROS 6 Mini pods
- How to change Vaporesso XROS 6 pods
- How to adjust the Vaporesso XROS 6 airflow
- How to fix a Vaporesso XROS 6 that is now working
- Vaporesso XROS 6 colours
- Best vape juice for Vaporesso XROS 6?
- What is the difference between the XROS 5 & XROS 6?
- What is the difference between the XROS 5 Mini & XROS 6 Mini?
- Vaporesso XROS 6 review
Vaporesso have released the latest addition to their XROS vape kit range, the XROS 6 and XROS 6 Mini. These new additions to the Vaporesso vape kits family incorporate a variety of upgraded features while maintaining the classic XROS design we know and love.
We’re taking a closer look at the XROS 6 and XROS 6 Mini to get all of the essential information you need in one handy guide.
How to set up your Vaporesso XROS 6 and XROS 6 Mini pod vape kit
Both the XROS 6 and XROS 6 Mini have an approachable design that is easy to get set up, whether you are new to vaping or are an experienced vaper. When you take the device out of the box it will have some charge, but we recommend charging until it reaches a full charge before getting started.
Both devices will come with a user manual, which we recommend reading before you get your device set up.
The first step to setting up your new XROS 6 or XROS 6 Mini is filling the pod with your chosen compatible vape juice. If preferred you can allow the coil to prime in the traditional way, by leaving it to sit with the e-liquid inside for 5 minutes before use. However, the XROS 6 offers a handy Smart Prime feature that can help you get started a bit quicker.
How to use Vaporesso XROS 6 Smart Prime
Once your pod has been filled with e-liquid insert it into the XROS 6 device and press the fire button three times to turn your vape kit on. Once on, press the fire button twice to enter the settings menu and select the ‘prime coil’ setting. Hold down the fire button for 3 seconds to start the Smart Prime feature and your coil will be primed and ready to use in just 60 seconds.
How to turn on your Vaporesso XROS 6
To turn your Vaporesso XROS 6 pod vape kit on you simply need to press the fire button five times in quick succession. This same process can be used to turn the device off again when not in use.
This same fire button can be used when vaping if you prefer button activation and also allows you to access the settings menu and make selections.
If you want to be able to protect your device when not in use but don’t want to have to turn it on and off all the time, the XROS 6 also offers a lock feature. If you're wondering how to lock Vaporesso XROS 6, you just need to press the fire button four times to lock or unlock the vape.
Get a closer look at setting up your Vaporesso XROS 6 vape kit in the following video:
How to turn on your Vaporesso XROS 6 Mini
The Vaporesso XROS 6 Mini offers a more minimalist design and does not have any buttons, so you actually don’t need to turn the device on or off to use it. Instead, the XROS 6 Mini utilises inhale activation so inhaling through the mouthpiece is all you need to do to vape.
If you'd like a visual aid to help you set up your Vaporesso XROS 6 Mini vape kit, take a look at the video below:
Vaporesso XROS 6: How to change the wattage
When using the COREX pods ranging from 0.6 – 1.2 ohm resistances, the Vaporesso XROS 6 device offers a choice of three power modes; normal, power and eco.
The normal mode, represented on the screen as NOR will automatically set the power output to the one most suited to your chosen pod.
If you would prefer a denser vapour you can switch to the power mode, represented on the screen as PWR, which will increase the wattage to the top end of the recommended wattage range for your pod.
Alternatively, eco mode will decrease the power to the lower end of the recommended wattage range to help preserve battery life and offer a lighter vapour production.
To switch between the three power modes, click the fire button three times, the power mode on the screen will flash and you can then use the button to cycle through the three options. Release the button on your chosen setting and it will stop flashing when the selection has been confirmed.
If you are using the 0.4 ohm COREX pods you will instead be able to manually adjust the wattage output. When you insert the pod your XROS 6 will automatically set the power to the recommended wattage setting, but you can follow the same process above to adjust the wattage up or down depending on your preference.
How to charge the Vaporesso XROS 6 & XROS 6 Mini
The Vaporesso XROS 6 vape kit offers a built-in 1800 mAh battery and features 3A fast-charging. The screen will show you the exact battery percentage you have remaining, so it is easy to identify when you need to think about charging.
You will find a USB-C charging cable in the box which can be used to connect the XROS 6 to an appropriate power source. We recommend always allowing the device to reach a full charge, which should take around 30 minutes. However, if you are in a rush, the XROS 6 can actually reach a 50% charge in just 10 minutes.
The XROS 6 Mini is also charged via USB-C cable, however it is important to note that a charging cable in not included with this device so you can use any suitable cable you have at home. If you don’t already have one, we do offer a USB-C charging cable which can be purchased separately.
As the XROS 6 Mini does not have a screen, the remaining battery power is communicated through the tidal light system on the front of the device. When all 5 lights are lit this indicates 80 – 100% battery power, four lights indicate 60 – 80%, three lights indicate 40 – 60%, two lights indicate 20 – 40%, and one light indicates 0 – 20% battery, letting you know it is time to recharge.
How long will the XROS 6 battery last?
The powerful 1800 mAh battery within the Vaporesso XROS 6 vape kit supports impressive performance, offering up to 5 days of use from a single charge. However, how long the battery will actually last between charges will depend on a number of factors, including your vaping style, wattage settings, and the frequency of use.
How long will the XROS 6 Mini battery last?
The Vaporesso XROS 6 Mini vape kit also features an impressive battery capacity of 1600 mAh. This can support up to 4 days of use per charge, but again this will depend on your own vaping style.
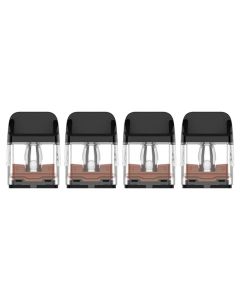
How to fill the Vaporesso XROS 6 & XROS 6 Mini pods
Both the XROS 6 and XROS 6 Mini are compatible with the entire range of Vaporesso XROS COREX pods. These pods are cross compatible across the XROS range, so if you are upgrading from a previous generation XROS vape kit you can continue to use any existing pods you already have.
To fill the pod first snap the mouthpiece to the side to reveal the filling port. It may be a little stiff when the pod is new but will loosen up with continued refills.
Your e-liquid should only be inserted into the red filling port. This red ‘membrane’ prevents leaking so you will need to push the nozzle of your vape juice bottle into the hold to fill the pod. We recommend filling the pod to around two thirds full.
Do not squeeze e-liquid into the central silver hole or the smaller hole on the opposite side to the filling port. The silver hole leads straight to the centre of your coil, and filling e-liquid in here will cause the e-liquid to not fill the coil but instead come out through the airflow and mouthpiece. The smaller hole is designed to release air as you fill the pod.
How to change Vaporesso XROS 6 pods
Changing the pod on your XROS 6 or XROS 6 Mini vape kit is extremely simple. All you need to do is pull the used pod out of the device and dispose of it. Then insert your new pod in place, the magnets inside the device will hold the pod securely in place and you will feel it snap in.
When using a new pod always remember to prime the pod, either by leaving it to absorb for 5 minutes or by using the Smart Prime function.
How do you know when it is time to change your XROS 6 pod?
There are a couple of different things that can indicate it is time to change your XROS 6 pod. The first indicator is usually a change in the flavour, whether it become muted or takes on a burnt or bitter flavour. This indicates that the cotton inside the coil is starting to burn.
You may also notice that the e-liquid inside the pod is starting to get darker in colour. Depending on the original colour of your e-liquid this can be a bit more difficult to notice but is a sign that the cotton is burning and the e-liquid is taking on the colour of the burning coil.
How to adjust the Vaporesso XROS 6 airflow
Both the XROS 6 and XROS 6 Mini have a precise airflow control switch. You can adjust this to make the inhale feel looser or tighter depending on your preference. Both devices utilise a new VENTURI airflow design to offer an incredibly smooth and flavourful vapour.
We recommend experimenting with different airflow settings when you first get your device to find what feels most comfortable for you.
How to fix a Vaporesso XROS 6 that is now working
If your Vaporesso XROS 6 or XROS 6 Mini is not working as expected the first thing to do is check that the battery is fully charged. If the battery gets too low the device will stop working, with the XROS 6 showing a low battery notification on the screen and the XROS 6 Mini flashing a white light.
If your XROS 6 is still not working check the screen to see if a error notification is showing, this usually means that one of the built-in safety features has activated. As the XROS 6 Mini does not have a screen it will usually indicate the error notification with a flashing red light. You can then check the user manual to identify the issue and how to resolve.
What does Vaporesso XROS 6 check atomiser mean?
The most common error message that you are likely to experience is a check atomiser fault. This means that the device is not able to properly detect the pod, preventing it from working correctly.
If you have not changed your pod in a while this could indicate that the coil is burnt and can no long function effectively, so changing the pod will resolve the issue.
Another reason your XROS 6 or XROS 6 Mini may not be able to detect a pod is that something is interrupting the connection. Remove the pod and clean the base of it and the inside of the device gently with a cotton bud or tissue. Dust, lint or e-liquid residue may be preventing the connection from being made.
If you have only just put in a new pod and are getting a check atomiser error, this may indicate that there is a fault with the pod itself. Try cleaning the pod and connection inside the device and if the issue continues try replacing the pod with a new one.
Vaporesso XROS 6 colours
The XROS 6 and XROS 6 Mini are each available in an array of different colours and finishes, letting you choose the option that best reflects your personality.
The XROS 6 pod kit is available in 11 colour options, including the sleek silk options in colours like green, grey and brown, classic options like cosmic black, abyssal blue and pearl white, and the visually interesting combinations of aurora blue and scorching cloud.
The XROS 6 Mini is also available in a choice of 11 colour ways, including the vibrant jelly finish in colours like orange, pink and green, along with classic options like black and titanium silver, and the patterned plume finish in colours like blue and pink ombre.
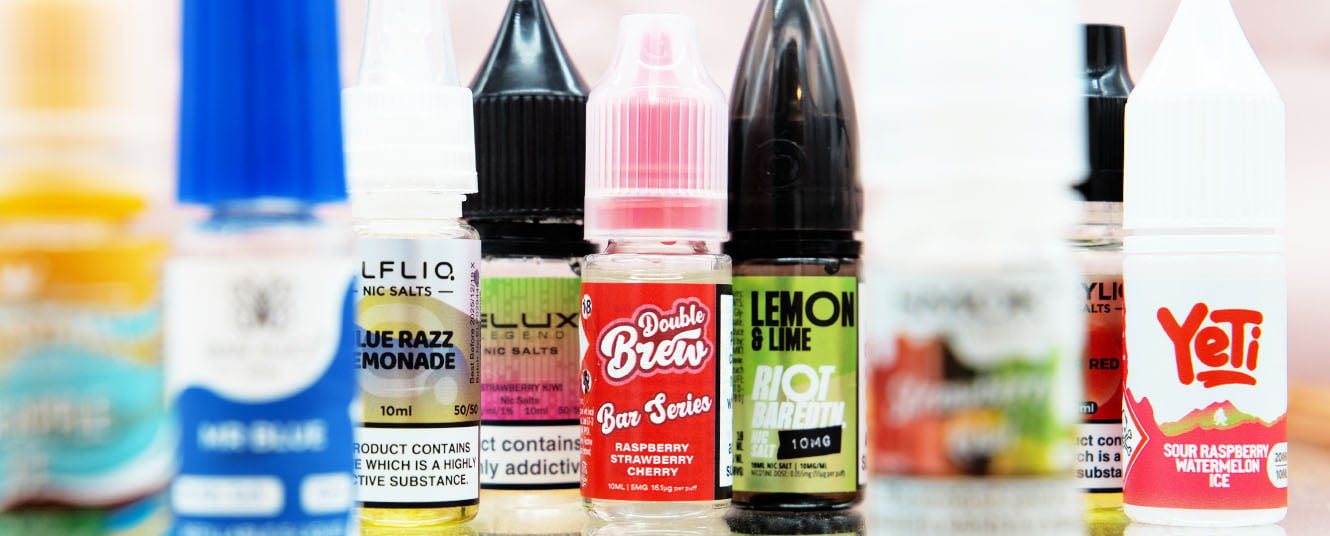
Best vape juice for Vaporesso XROS 6?
Both the XROS 6 and XROS 6 Mini use the COREX pods which are best paired with a 50/50 or high PG vape juice. The thinner consistency of these e-liquids is easy for the coil within the pod to absorb without drying out between inhales.
As long as you are opting for a 50/50 or high PG e-liquid, the flavour, brand and nicotine strength are entirely up to you. The XROS 6 and XROS 6 Mini work fantastically with both nic salts and freebase e-liquids, allowing you to choose the exact option that suits your preferences and will most effectively manage your nicotine cravings.
If you are looking for a really intense flavour you might want to consider pairing your device with a double concentrate e-liquid like the Vampire Vape Max, DOJOLIQ or Double Brew ranges. These e-liquids have a higher concentration of flavour to offer a stronger taste that works great with the COREX mesh pods.
What is the difference between the XROS 5 & XROS 6?
The XROS 6 utilises a larger battery than its predecessor the Vaporesso XROS 5 vape kit, offering longer use between charges. It also offers the improved VENTURI airflow system which works in collaboration with the COREX pods to provide a smoother, more flavourful and consistent vapour.
Another great addition that is unique to the XROS 6 generations is the Smart Prime function, which is really convenient when setting up a new pod and lets you get back to vaping quicker following a pod change than with previous XROS devices like the Vaporesso XROS 5 pod kit.
What is the difference between the XROS 5 Mini & XROS 6 Mini?
The XROS 6 Mini also features a larger battery capacity than the Vaporesso XROS 5 Mini, offering up to four days of use from a full charge. While those who are upgrading from the previous generation can continue to use any existing Vaporesso XROS 5 pods their new device, as the COREX range is cross compatible, the XROS 6 Mini does offer an improved vaping experience thanks to the new airflow system, which provides a smoother vapour and may help the pods last longer between changes.
Vaporesso XROS 6 review
Vaporesso are renowned for their reliable, intuitive and user-friendly vape kits, and the XROS 6 devices are no exception to this rule. Whether you are new to vaping and are looking for a simple starter kit like the XROS 6 Mini, or are an experienced vaper and are looking to upgrade to a pod kit that incorporates state of the art technology while remaining approachable like the XROS 6, these versatile devices cater to a wide range of users.
The Vaporesso XROS 6 and XROS 6 Mini pod vape kits are available now, if you want to find out more pop into your local Evapo store or reach out to our Customer Service team online.